Constructs: Difference between revisions
Jump to navigation
Jump to search
(→Bases) |
m (Protected "Constructs" ([Edit=Allow only administrators] (indefinite) [Move=Allow only administrators] (indefinite))) |
||
| (65 intermediate revisions by the same user not shown) | |||
| Line 1: | Line 1: | ||
[[File:Butler Head Example.png|thumb|500px|Constructs Menu]] | |||
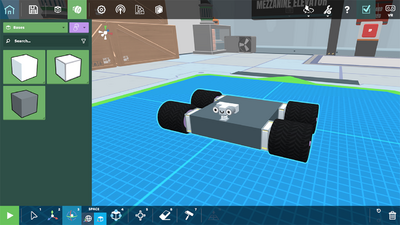
==Heads== | Constructs are pre-assembled groups of parts, and are divided into categories: [[Constructs#⚙ Heads|Heads]], [[Constructs#⚙ Bases|Bases]], [[Constructs#⚙ Powered Joints|Powered Joints]], [[Constructs#⚙ Wheels|Wheels]], and [[Constructs#⚙ Effectors|Effectors]]. Players are able to assemble their own constructs out of the [[Parts]] menu. | ||
==⚙ Heads== | |||
{| class="wikitable" | {| class="wikitable" | ||
| Line 8: | Line 10: | ||
! style="background-color:#5dc8f4;" | Icon | ! style="background-color:#5dc8f4;" | Icon | ||
! style="background-color:#5dc8f4;" | Description | ! style="background-color:#5dc8f4;" | Description | ||
! style="background-color:#5dc8f4;" | Cost | |||
! style="background-color:#5dc8f4;" | Mass | ! style="background-color:#5dc8f4;" | Mass | ||
! style="background-color:#5dc8f4;" | Example | ! style="background-color:#5dc8f4;" | Example | ||
|- | |- | ||
|Bobble | |Bobble | ||
|[[File:Bobble Head Icon.png|75px]] | |[[File:Bobble Head Icon.png|75px]] | ||
|A head that bobbles | |A head that bobbles. | ||
|$32 | |||
|3.49 | |3.49 | ||
|[[File:Bobble Head Example.png|400px]] | |||
|[[File:Bobble Head Example.png| | |||
|- | |- | ||
|Kitty | |style="background-color:#ECECEC;" | Kitty | ||
|[[File:Kitty Head Icon.png|75px]] | |style="background-color:#ECECEC;" | [[File:Kitty Head Icon.png|75px]] | ||
|A head that looks like a cute cat | |style="background-color:#ECECEC;" | A head that looks like a cute cat. | ||
|9. | |style="background-color:#ECECEC;" | $120 | ||
| | |style="background-color:#ECECEC;" | 9.16 | ||
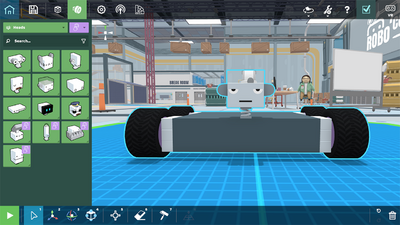
|style="background-color:#ECECEC;" | [[File:Kitty Head Example.png|400px]] | |||
|[[File:Kitty Head Example.png| | |||
|- | |- | ||
|Spike | |Spike | ||
|[[File:Spike Head Icon.png|75px]] | |[[File:Spike Head Icon.png|75px]] | ||
|A head that is extra tall | |A head that is extra tall. | ||
|$52 | |||
|4.59 | |4.59 | ||
|[[File:Spike Head Exmaple.png|400px]] | |||
|[[File:Spike Head Exmaple.png| | |||
|- | |- | ||
|Butler | |style="background-color:#ECECEC;" | Butler | ||
|[[File:Butler Head Robot.png|75px]] | |style="background-color:#ECECEC;" | [[File:Butler Head Robot.png|75px]] | ||
|A head for the best server bots | |style="background-color:#ECECEC;" | A head for the best server bots. | ||
|2.92 | |style="background-color:#ECECEC;" | $48 | ||
| | |style="background-color:#ECECEC;" | 2.92 | ||
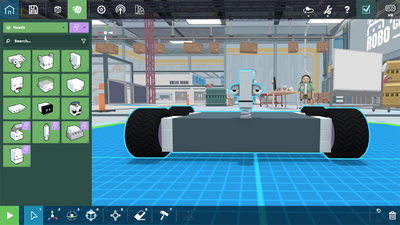
|style="background-color:#ECECEC;" | [[File:Butler Head Example.png|400px]] | |||
|[[File:Butler Head Example.png| | |||
|- | |- | ||
|Sleepy | |Sleepy | ||
|[[File:Sleepy Head Icon.png|75px]] | |[[File:Sleepy Head Icon.png|75px]] | ||
|A head for the robot that didn’t want to go to work today | |A head for the robot that didn’t want to go to work today. | ||
|$106 | |||
| | |15.29 | ||
| | |[[File:Sleepy Head Example.png|400px]] | ||
|[[File:Sleepy Head Example.png| | |||
|- | |- | ||
|Blockhead | |style="background-color:#ECECEC;" | Blockhead | ||
|[[File:Blockhead Icon.png|75px]] | |style="background-color:#ECECEC;" | [[File:Blockhead Icon.png|75px]] | ||
|A head known for its simplicity | |style="background-color:#ECECEC;" | A head known for its simplicity. | ||
| | |style="background-color:#ECECEC;" | $72 | ||
| | |style="background-color:#ECECEC;" | 3.70 | ||
| | |style="background-color:#ECECEC;" | [[File:Block Head Example.png|400px]] | ||
|[[File:Block Head Example.png| | |||
|- | |- | ||
|Flattop | |Flattop | ||
|[[File:Flattop Icon.png|75px]] | |[[File:Flattop Icon.png|75px]] | ||
|A head that's flatter | |A head that's flatter than the flattest. | ||
|$72 | |||
|4.25 | |4.25 | ||
|[[File:Flattop Head Example.png|400px]] | |||
|[[File:Flattop Head Example.png| | |||
|- | |- | ||
| | |style="background-color:#ECECEC;" | Screenface | ||
|[[File: | |style="background-color:#ECECEC;" | [[File:Screenface Head Icon.png|75px]] | ||
| | |style="background-color:#ECECEC;" | A head with a screen. | ||
| | |style="background-color:#ECECEC;" | $84 | ||
| | |style="background-color:#ECECEC;" | 5.80 | ||
| | |style="background-color:#ECECEC;" | [[File:Screenface Head Example.png|400px]] | ||
|[[File: | |||
|- | |- | ||
|} | |} | ||
==Bases== | [[#top|Back to Top]] | ||
==⚙ Bases== | |||
{| class="wikitable" | {| class="wikitable" | ||
| Line 126: | Line 81: | ||
! style="background-color:#5dc8f4;" | Icon | ! style="background-color:#5dc8f4;" | Icon | ||
! style="background-color:#5dc8f4;" | Description | ! style="background-color:#5dc8f4;" | Description | ||
! style="background-color:#5dc8f4;" | Cost | |||
! style="background-color:#5dc8f4;" | Mass | ! style="background-color:#5dc8f4;" | Mass | ||
! style="background-color:#5dc8f4;" | Example | ! style="background-color:#5dc8f4;" | Example | ||
|- | |- | ||
|Cube (Light) | |Cube (Light) | ||
|[[File:Cube (Light) Icon.png|75px]] | |[[File:Cube (Light) Icon.png|75px]] | ||
|A lightweight cube resized to 3x3 to match the size of other constructs | |A lightweight cube resized to 3x3 to match the size of other constructs. | ||
|$108 | |||
| | |5.40 | ||
| | |[[File:Light Base Example.png|400px]] | ||
|[[File:Light Base Example.png| | |||
|- | |- | ||
|Cube (Medium) | |style="background-color:#ECECEC;" | Cube (Medium) | ||
|[[File: | |style="background-color:#ECECEC;" | [[File:Medium Base Icon.png|75px]] | ||
|A medium cube resized to 3x3 to match the size of other constructs | |style="background-color:#ECECEC;" | A medium cube resized to 3x3 to match the size of other constructs. | ||
|27.0 | |style="background-color:#ECECEC;" | $54 | ||
| | |style="background-color:#ECECEC;" | 27.0 | ||
|style="background-color:#ECECEC;" | [[File:Medium Base Example.png|400px]] | |||
|[[File: | |||
|- | |- | ||
|Cube (Heavy) | |Cube (Heavy) | ||
|[[File:Cube (Heavy) Icon.png|75px]] | |[[File:Cube (Heavy) Icon.png|75px]] | ||
|A heavy cube resized to 3x3 to match the seize of other constructs | |A heavy cube resized to 3x3 to match the seize of other constructs. | ||
|54.0 | |54.0 | ||
| | |81.0 | ||
|[[File:Heavy Base Example.png|400px]] | |||
|[[File:Heavy Base Example.png| | |||
|- | |- | ||
|} | |} | ||
==Powered Joints== | [[#top|Back to Top]] | ||
==⚙ Powered Joints== | |||
{| class="wikitable" | {| class="wikitable" | ||
|- | |- | ||
| Line 163: | Line 116: | ||
! style="background-color:#5dc8f4;" | Icon | ! style="background-color:#5dc8f4;" | Icon | ||
! style="background-color:#5dc8f4;" | Description | ! style="background-color:#5dc8f4;" | Description | ||
! style="background-color:#5dc8f4;" | Cost | |||
! style="background-color:#5dc8f4;" | Mass | ! style="background-color:#5dc8f4;" | Mass | ||
! style="background-color:#5dc8f4;" | Controllable? | ! style="background-color:#5dc8f4;" | Controllable? | ||
| Line 168: | Line 122: | ||
! style="background-color:#5dc8f4;" | Example | ! style="background-color:#5dc8f4;" | Example | ||
|- | |- | ||
|Hinge ( | |Hinge (Small) | ||
|[[File: | |[[File:Hingle (Small) Icon.png|75px]] | ||
| | |A small vertical hinge. | ||
| | |$56 | ||
|5.4 | |||
|Yes | |Yes | ||
|[ | |[I] [K] [J] [L] [U] [O] | ||
|[[File: | |rowspan="4" | [[File:Hinge Construct Example.png|400px]] | ||
|- | |- | ||
| | |Hinge | ||
|[[File: | |[[File:Hinge Construct Icon.png|75px]] | ||
| | |A vertical hinge. | ||
| | |%428 | ||
|27.60 | |||
|Yes | |Yes | ||
|[ | |[I] [K] [J] [L] [U] [O] | ||
|- | |- | ||
| | |Hinge (Large) | ||
|[[File: | |[[File:Hingle (Large) Icon.png|75px]] | ||
| | |A large vertical hinge. | ||
| | |$770 | ||
|27.60 | |||
|Yes | |Yes | ||
|[ | |[I] [K] [J] [L] [U] [O] | ||
|- | |- | ||
| | |Hinge (Huge) | ||
|[[File: | |[[File:Hinge (Huge) Icon.png|75px]] | ||
| | |A powerful vertical hinge. | ||
| | |$1,122 | ||
|39.80 | |||
|Yes | |Yes | ||
|[ | |[I] [K] [J] [L] [U] [O] | ||
|[[File: | |- | ||
|style="background-color:#ECECEC;" | Spin Motor (Small) | |||
|style="background-color:#ECECEC;" | [[File:Spin Motor (Small) Icon.png|75px]] | |||
|style="background-color:#ECECEC;" | A small controllable DC Motor. | |||
|style="background-color:#ECECEC;" | $86 | |||
|style="background-color:#ECECEC;" | 2.20 | |||
|style="background-color:#ECECEC;" | Yes | |||
|style="background-color:#ECECEC;" | [I] [K] [J] [L] [U] [O] | |||
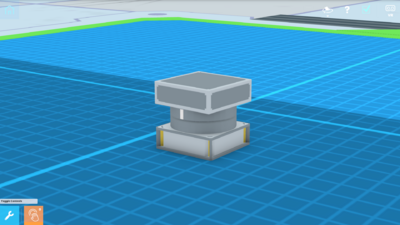
|style="background-color:#ECECEC;" rowspan="4" | [[File:Spin Motor Construct Example.png|400px]] | |||
|- | |||
|style="background-color:#ECECEC;" | Spin Motor (Medium) | |||
|style="background-color:#ECECEC;" | [[File:Spin Motor Icon.png|75px]] | |||
|style="background-color:#ECECEC;" | A controllable DC Motor. | |||
|style="background-color:#ECECEC;" | $299 | |||
|style="background-color:#ECECEC;" | 22.5 | |||
|style="background-color:#ECECEC;" | Yes | |||
|style="background-color:#ECECEC;" | [I] [K] [J] [L] [U] [O] | |||
|- | |||
|style="background-color:#ECECEC;" | Spin Motor (Large) | |||
|style="background-color:#ECECEC;" | [[File:Spin Motor (Large) Icon.png|75px]] | |||
|style="background-color:#ECECEC;" | A large controllable DC Motor. | |||
|style="background-color:#ECECEC;" | %569 | |||
|style="background-color:#ECECEC;" | 31.50 | |||
|style="background-color:#ECECEC;" | Yes | |||
|style="background-color:#ECECEC;" | [I] [K] [J] [L] [U] [O] | |||
|- | |||
|style="background-color:#ECECEC;" | Spin Motor (Huge) | |||
|style="background-color:#ECECEC;" | [[File:Spin Motor (Huge) Icon.png|75px]] | |||
|style="background-color:#ECECEC;" | A huge controllable DC Motor. | |||
|style="background-color:#ECECEC;" | $839 | |||
|style="background-color:#ECECEC;" | 40.50 | |||
|style="background-color:#ECECEC;" | Yes | |||
|style="background-color:#ECECEC;" | [I] [K] [J] [L] [U] [O] | |||
|- | |||
|Piston Small | |||
|[[File:Piston Small Construct Icon.png|75px]] | |||
|A small controllable piston. | |||
|$200 | |||
|10.25 | |||
|Yes | |||
|[I] [K] [J] [L] [U] [O] | |||
|rowspan="4" | [[File:Piston Contruct Example.png|400px]] | |||
|- | |||
|Piston Small (Long) | |||
|[[File:Piston Small Long Construct Icon.png|75px]] | |||
|A longer small controllable piston. | |||
|$347 | |||
|16.72 | |||
|Yes | |||
|[I] [K] [J] [L] [U] [O] | |||
|- | |||
|Piston Large | |||
|[[File:Piston Large Construct Icon.png|75px]] | |||
|A large controllable piston. | |||
|$348 | |||
|328.92 | |||
|Yes | |||
|[I] [K] [J] [L] [U] [O] | |||
|- | |||
|Piston Large (Long) | |||
|[[File:Piston Large Long Construct Icon.png|75px]] | |||
|A longer large controllable piston. | |||
|$604 | |||
|585.40 | |||
|Yes | |||
|[I] [K] [J] [L] [U] [O] | |||
|- | |- | ||
|} | |} | ||
==Wheels== | [[#top|Back to Top]] | ||
==⚙ Wheels== | |||
{| class="wikitable" | {| class="wikitable" | ||
| Line 209: | Line 232: | ||
! style="background-color:#5dc8f4;" | Icon | ! style="background-color:#5dc8f4;" | Icon | ||
! style="background-color:#5dc8f4;" | Description | ! style="background-color:#5dc8f4;" | Description | ||
! style="background-color:#5dc8f4;" | Cost | |||
! style="background-color:#5dc8f4;" | Mass | ! style="background-color:#5dc8f4;" | Mass | ||
! style="background-color:#5dc8f4;" | Controllable? | ! style="background-color:#5dc8f4;" | Controllable? | ||
| Line 214: | Line 238: | ||
! style="background-color:#5dc8f4;" | Example | ! style="background-color:#5dc8f4;" | Example | ||
|- | |- | ||
|Left | |Tiny Solid Wheels (Left & Right) | ||
|[[File: | |[[File:Solid Wheel Tiny Construct Icon.png|75px]] | ||
| | |rowspan="3" | Solid wheels are high, friction, but bumpy at high RPM. | ||
| | |$52 | ||
|3.0 | |||
|Yes | |Yes | ||
|[W][A][S][D][E][Q] | |[W] [A] [S] [D] [E] [Q] | ||
|[[File: | |[[File:Solid Wheels Tiny Example.png|400px]] | ||
|- | |- | ||
|Right | |Medium Solid Wheels (Left & Right) | ||
|[[File: | |[[File:Solid Wheel Medium Construct Icon.png|75px]] | ||
| | |$328 | ||
| | |23.0 | ||
|Yes | |Yes | ||
|[W][A][S][D][E][Q] | |[W] [A] [S] [D] [E] [Q] | ||
|[[File: | |[[File:Solid Wheels Medium Example.png|400px]] | ||
|- | |||
|Huge Solid Wheels (Left & Right) | |||
|[[File:Solid Wheel Huge Construct Icon.png|75px]] | |||
|$902 | |||
|59.00 | |||
|Yes | |||
|[W] [A] [S] [D] [E] [Q] | |||
|[[File:Solid Wheels Huge Example.png|400px]] | |||
|- | |||
|style="background-color:#ECECEC;" | Small RC Wheels (Left and Right) | |||
|style="background-color:#ECECEC;" | [[File:Small RC Wheel Construct Icon.png|75px]] | |||
|style="background-color:#ECECEC;" rowspan="2" | RC Wheels is low friction, and smoother at high RPM. | |||
|style="background-color:#ECECEC;" | $80 | |||
|style="background-color:#ECECEC;" | 5.0 | |||
|style="background-color:#ECECEC;" | Yes | |||
|style="background-color:#ECECEC;" | [W] [A] [S] [D] [E] [Q] | |||
|style="background-color:#ECECEC;" | [[File:RC Wheels Tiny Example.png|400px]] | |||
|- | |||
|style="background-color:#ECECEC;" | Medium RC Wheels (Left and Right) | |||
|style="background-color:#ECECEC;" | [[File:Medium RC Wheel Construct Icon.png|75px]] | |||
|style="background-color:#ECECEC;" | $340 | |||
|style="background-color:#ECECEC;" | 31.00 | |||
|style="background-color:#ECECEC;" | Yes | |||
|style="background-color:#ECECEC;" | [W] [A] [S] [D] [E] [Q] | |||
|style="background-color:#ECECEC;" | [[File:RC Wheels Medium Example.png|400px]] | |||
|- | |- | ||
|} | |} | ||
==Effectors== | [[#top|Back to Top]] | ||
==⚙ Effectors== | |||
{| class="wikitable" | {| class="wikitable" | ||
| Line 239: | Line 291: | ||
! style="background-color:#5dc8f4;" | Icon | ! style="background-color:#5dc8f4;" | Icon | ||
! style="background-color:#5dc8f4;" | Description | ! style="background-color:#5dc8f4;" | Description | ||
! style="background-color:#5dc8f4;" | Cost | |||
! style="background-color:#5dc8f4;" | Mass | ! style="background-color:#5dc8f4;" | Mass | ||
! style="background-color:#5dc8f4;" | Controllable? | ! style="background-color:#5dc8f4;" | Controllable? | ||
| Line 245: | Line 298: | ||
|- | |- | ||
|Vacuum | |Vacuum | ||
| | | | ||
|A vacuum | |A vacuum end effector with preset controls. | ||
| | |418 | ||
|16.4 | |||
|Yes | |Yes | ||
|[ | |[I] [K] [J] [L] [U] [O] | ||
|[[File: | |[[File:Vacuum Example.png|400px]] | ||
|- | |- | ||
|Powered Pincer | |style="background-color:#ECECEC;" | Powered Pincer | ||
|[[File:Pincer Claw (Effector) Icon.png|75px]] | |style="background-color:#ECECEC;" | [[File:Pincer Claw (Effector) Icon.png|75px]] | ||
|An opening and closing claw | |style="background-color:#ECECEC;" | An opening and closing claw. | ||
|2.5 | |style="background-color:#ECECEC;" | 651 | ||
|Yes | |style="background-color:#ECECEC;" | 2.5 | ||
|[ | |style="background-color:#ECECEC;" | Yes | ||
|[[File: | |style="background-color:#ECECEC;" | [I] [K] [J] [L] [U] [O] | ||
|style="background-color:#ECECEC;" | [[File:Pincer Example.png|400px]] | |||
|- | |- | ||
|} | |} | ||
[[#top|Back to Top]] | |||
Latest revision as of 20:58, 19 July 2023
Constructs are pre-assembled groups of parts, and are divided into categories: Heads, Bases, Powered Joints, Wheels, and Effectors. Players are able to assemble their own constructs out of the Parts menu.


